• Home
  • Download
  • Features
    • Testimonials
  • How to
  • Help
    • Videos tutorials
    • Quick Start >
      • How to get songbooks
      • How to get Bibles
      • How to display song lyrics and Bible verses
      • How to import songs and Bibles from other sources
      • How to add/edit songs and announcements
    • Main features
    • Why two modes
    • “Viewer” mode >
      • Songbooks and Bibles
      • The agenda
      • The slides
      • The preview area
      • The keyboard shortcuts
    • Search for >
      • Songs
      • Bible verses
    • Display >
      • A slideshow
      • A PowerPoint
      • A video
    • “Edit” mode >
      • Hierarchical styles
      • Style explorer
      • Edit a song
    • Screen resolution and ratio
    • Import assistant
  • Blog
  • Contact
  • About

VideoPsalm


Display song verses in lower third

12/22/2022

1 Comment

 
This topic describes how to display the song lyrics in the lower third and automatically limit the song verse lines to 2.
Normal display
Picture
Lower third display
Picture
1. Click on a song.
This displays the song verses in the slide panel, at the top-right:
Picture
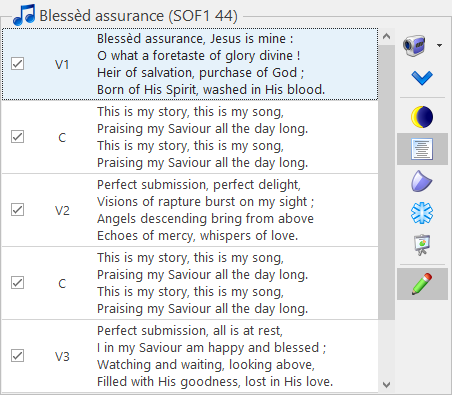
2. Click its first verse, so as to display it in the preview area:
Picture
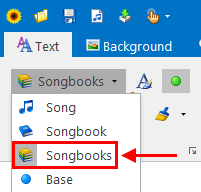
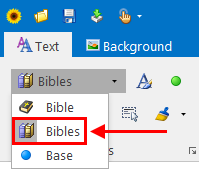
3. Select the "Songbooks" style level:
Picture
From now on, all changes that you do to the style will be assigned at the "Songbooks" level.
This means that all songs verses will be displayed accordingly (unless they have a higher style level change).
Cascading styles
VideoPsalm uses the concept of cascading style attributes, enabling you to define any style attribute at any level: song verse, song, songbook, all songbooks, base.

How to change the background of a song or a whole songbook - Cascading styles part one
How to assign a background to a song verse or to the whole song - Cascading styles part two
Three methods to display a background/logo between two songs
How to remove an image assigned to a song verse
How to adjust slide text margins
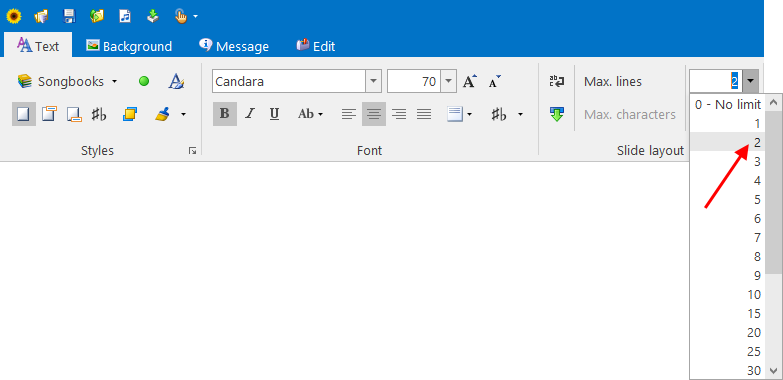
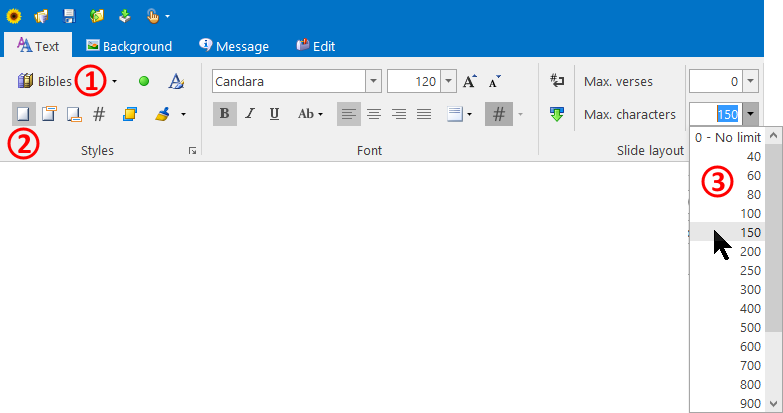
4. Limit the number of verse lines to 2:
Picture
The slide panel reflects your changes immediately:
Before:
Picture
Picture
After:
Picture
Picture
To refresh the preview area, click the first song verse (that now has 2 lines) in the slide panel at the top-right.
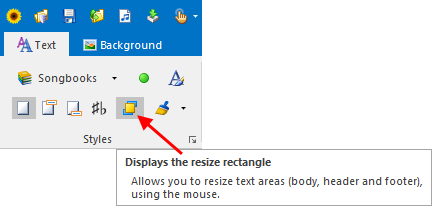
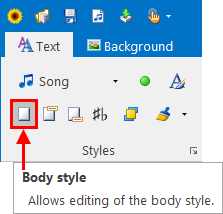
5. Press the "Display the resize rectangle" button:
Picture
This opens the "Size and position" dialog:
Picture
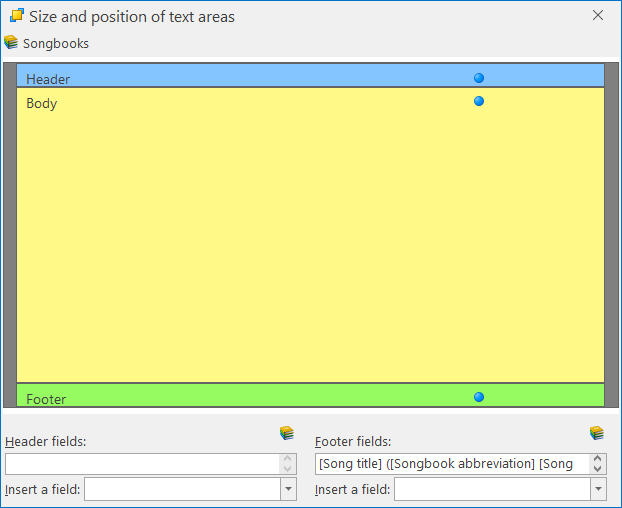
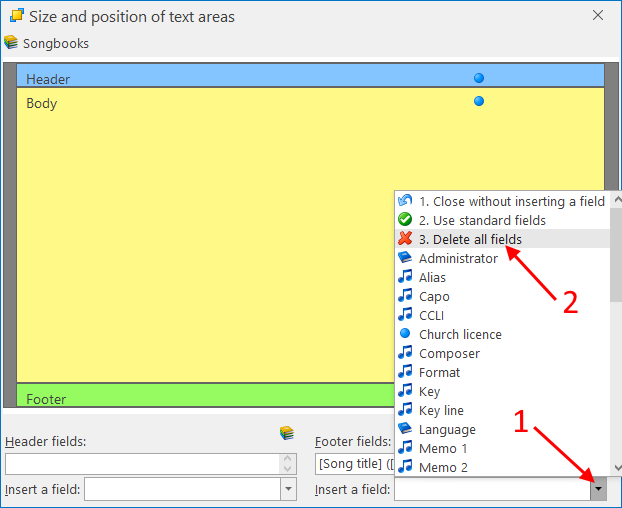
6. Remove the footer content:
Picture
7. Move and resize the body area to the bottom:
Picture
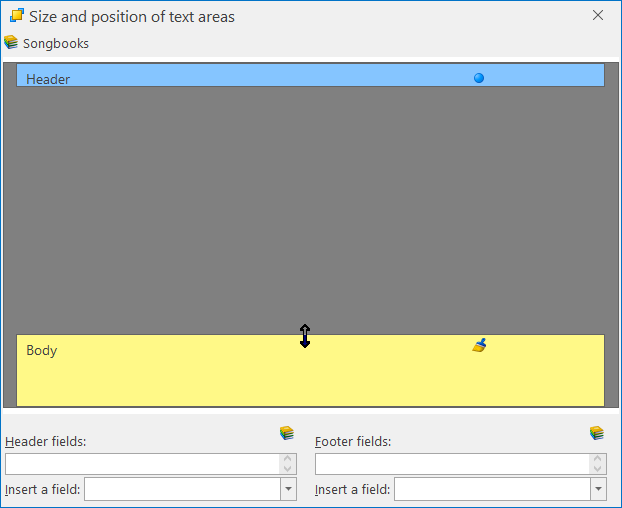
The preview area displays the changes:
Picture
From now on, all song verses of all songbooks will be displayed 2 lines at a time, in the lower third.
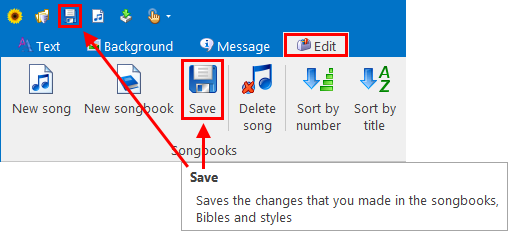
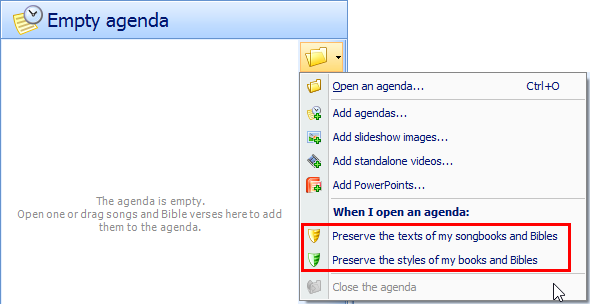
8. Save your changes:
Picture
Additional read
How to adjust slide text margins / lower third display
1 Comment

Split long Bible verses after a given number of characters

8/16/2022

5 Comments

 
This topic describes how to split Bible verses after a given number of characters.
It enables to limit the amount of text displayed on a slide, and makes sure that the text is well readable, even from far away.
See also
Display several Bible verses on the same slide
The screenshot below shows different Bible verses, one per slide, and illustrate how this can be useful:
Romans 8:25 : A relatively short verse
Picture
Romans 8:26 : A relatively long verse
Picture
You will notice that the long Bible verse (at the right) is displayed with a smaller font size.
This is because VideoPsalm automatically reduces the font size to fit the content into the slide.
However, you may prefer VideoPsalm to split long verses in two slides instead of reducing the font size.

To automatically split long Bible verses in two slides, proceed as follows:
1. Select the “Bibles” style level:
Picture
See also
-
VideoPsalm cascading style levels
- Automatic style level switching
2. Make sure that the “Body style” is selected (it is the normal situation):
Picture
3. Select how many characters should be rendered on one slide, for example 150:
Picture
Romans 8:26 is now rendered on two slides:
Picture
Slide 1
Picture
Slide 2
Note
When you select "Maximum 150 characters", VideoPsalm will not split the verse at precisely the 150st character. Instead, it will find an optimal place where to split, around a punctuation mark or a white space, somewhere before the 150st character.
What to do when the second slide contains only a few words?
When a verse gets split, it can happen that the following slide contains only a few words (See slide 2 just higher up).
You can tell VideoPsalm to "fill-up" the remaining slide with the consecutive text:

4. Again, make sure that you have selected the "Bibles" style level and the "Body style".

5. Press the "Extend to next verses" button:
Picture
Now, VideoPsalm fills-in the second slide with the text from following verse:
Picture
Slide 2 without "Extend"
Picture
Slide 2 with "Extend"
6. Save your changes:
Picture
5 Comments

Transfer songs from one PC to another

6/24/2022

52 Comments

 
This topic describes 4 methods to transfer and synchronize VideoPsalm songs from one PC to another.
Picture

Picture

Method 1
Use an agenda

This solution comes in handy when you prepare your agenda on your HOME PC,
or when you only have a few songs to transfer.

It is something that may happen to you on a weekly basis.
1. On your HOME PC, type-in new songs and make song corrections.
2. Put all new or edited songs into an agenda.
3. Save the agenda onto a USB stick.

An agenda contains all that is needed to reproduce your presentation identically on the CHURCH PC: 
  • Songs with their lyrics
  • Styles (the backgrounds, styles at different levels)
  • Songbooks definitions
  • Styles (Songbooks, Bibles, Base)
  • Slideshow images
  • Standalone videos
  • PowerPoints 
  • etc. 

4. On the CHURCH PC, open the agenda from the USB stick.
VideoPsalm will automatically:
  • Add to your CHURCH PC all the agenda songs, in particular those that are not yet there.
  • Create the potential new songbooks.
  • Add the song backgrounds to the image and video galleries.
  • If the songs are already on the CHURCH PC, their lyrics and other attributes are replaced by those from the agenda, depending on how you set up the “Agenda open” options on the CHURCH PC:
“Agenda Open” options
Picture
Preserve the text of my songbooks and Bibles
When this option is active, VideoPsalm does not replace the song lyrics on the CHURCH PC with those from the agenda (those from the HOME PC).
In case the CHURCH PC misses one or more songs from the agenda, VideoPsalm adds them to its songbooks, and, if necessary, creates the corresponding songbooks, regardless of the state of agenda open options.

Picture
Picture
Preserve the styles of my songbooks and Bibles
When this option is active, VideoPsalm does not replace the styles of songs on the CHURCH PC by those from the agenda (those from the HOME PC).

Note  The “Agenda open” options are turned off by default. 
However, it is advised to turn these options on on the CHURCH PC, in order to protect the church song lyrics, their styles, etc. against changes propagated from your HOME PC through agendas, week after week.
Consider following example
Someone prepares an agenda on his HOME PC. Among the songs, one is called “King of kings”. In our example, this song contains an accidentally mistyped title “King of all kings”. There are possibly other misspellings in the lyrics.
To prevent these errors to propagate to the CHURCH PC, enable the “Preserve the text of my songbooks and Bibles” option on the CHURCH PC.

In case your shields are both set, only new songs will be added to your CHURCH PC. Songs that already exist on your CHURCH PC won't get modified.

5. Finally, save the potential changes produced by opening the agenda:
Picture
If you forget to save your changes, VideoPsalm will remind you about it when you close it.

Note that the songbooks and the Bibles only take little space on your hard drive: 
4 songbooks with hundreds of songs occupy about the space of a photo taken by your smartphone.
A Bible takes about as much space as a photo too.
YouTube tutorial
Open an agenda file
"Agenda open" shields/options (jump directly at 2' 27s)

With method 2 (compared to method 3 - Backup/restore, see further), you will want to manually copy the “SongbookStyle.json” and the “RootStyle.json” style files located in the VideoPsalm document folder.
This will ensure that your songs at church will get displayed with the same “Songbooks” and “Base” styles as at home.
Picture

Method 2
Transfer the songbooks directly


Picture

Method 3
Use the VideoPsalm backup/restore feature

In a common situation, you have VideoPsalm installed on your HOME PC, and on the CHURCH PC.

The initial setup follows more or less these steps:

On your NOME PC
1. Install VideoPsalm.
2. Add predefined songbooks.
3. Add Bibles.
4. Assign style attributes, like font, size, alignment, colors, animations, etc.
5. Type-in some songs.
6. etc.
7. Using VideoPsalm's integrated Backup/Restore functions, backup the VideoPsalm documents to a USB stick.

On your CHURCH PC
You want to get exactly the same setup as the one you have at home.
1. Install VideoPsalm.
2. Using VideoPsalm's integrated Backup/Restore functions, restore the USB stick backup to the church PC.
VideoPsalm stores each songbook in a file on your hard drive.
A handy way to transfer a songbook from one PC to another, is to copy its file from one PC to the other, for example via a USB stick.

To easily locate the songbook on your hard drive, open the VideoPsalm options, and press the “Explore” button:
Picture
Your songbooks are located in the “Songbooks” sub-folder.
Copy the songbook onto a USB stick.
On the CHURCH PC, paste your USB stick songbooks to the corresponding VideoPsalm folder.
Additional read:
How to backup VideoPsalms' data or start it from a USB stick (portable VideoPsalm)

Picture

Method 4
Use a service like Dropbox or Microsoft OneDrive

This requires an internet connection for both your HOME and CHURCH PCs.
Solution overview
1. Move your HOME PC VideoPsalm document folder into a Dropbox folder and make VideoPsalm point to this folder via its options.
2. Setup your CHURCH PC VideoPsalm document folder to the same Dropbox folder.
3. At CHURCH, wait until Dropbox finishes to sync its files before you open VideoPsalm.

Detailed instructions
To sync songs between multiple computers, you can use a service like Dropbox or any other similar cloud solution.

VideoPsalm usually stores its songbook files in the following folder:
C:\Users\Public\Documents\VideoPsalm

To setup your VideoPsalm to sync with Dropbox:

1. With a File Explorer, copy the "C:\Users\Public\Documents\VideoPsalm" folder and its whole content into a Dropbox folder.

2. Start VideoPsalm.
It will load its documents (songbooks, Bibles, images, videos, etc.) from the usual location, namely from:
C:\Users\Public\Documents\VideoPsalm


3. In its settings, tell VideoPsalm to load its files from the Dropbox location:
Picture
4. Click “OK” and confirm that you now want VideoPsalm to load its settings from this Dropbox folder.
The next time that you start VideoPsalm, it will remember to load its documents from this new location.

5. Proceed from step 3 on all PCs that you want to sync your songbooks with.
Additional points and remarks
  • You will need to "share" your Dropbox VideoPsalm folder with the other PCs, so that they get the changes from the other PCs.
  • Make sure that the changes from other PCs are propagated onto the PC before you start VideoPsalm.
  • Modify documents (songs, settings, etc.) only on one PC at any given time, or else Dropbox will create a copy of the songbook, giving it a filename including the date and time of the conflict.
    (This enables you to identify at what time the conflict happen.)
52 Comments
<<Previous

    Categories

    All
    Bible
    Bilingual
    CCLI
    Language
    SongSelect
    Translation

    Archives

    December 2022
    August 2022
    June 2022
    March 2022
    February 2022
    January 2022
    December 2021
    April 2021
    July 2020
    June 2020
    May 2020
    December 2018
    August 2017
    July 2017
    January 2017
    October 2016
    July 2016
    June 2016
    July 2015
    June 2015
    May 2015
    February 2015
    January 2015
    November 2014
    September 2014
    July 2014
    June 2014
    May 2014
    April 2014
    March 2014
    December 2013
    November 2013
    September 2013
    August 2013
    June 2013
    May 2013
    April 2013
    February 2012

    RSS Feed

Powered by Create your own unique website with customizable templates.