Here are three ways to display an image, logo or video between two songs.
Each method has its advantages, and demonstrates some of VideoPsalm functionalities.
Each method has its advantages, and demonstrates some of VideoPsalm functionalities.
Method 1
Display the church logo after each song
This method produces a result very quickly but requires mastering the VideoPsalm cascading style mechanism.
It is the recommended method if you don't need different backgrounds between two songs in the same agenda.
It is the recommended method if you don't need different backgrounds between two songs in the same agenda.
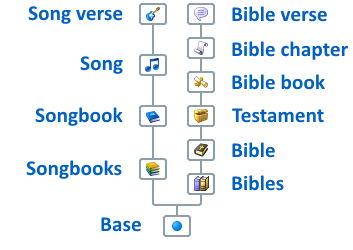
| First, some explanations: When VideoPsalm displays a song verse, its background originates from one of several levels, depending on what you have set:
|  |
For example, if you assign a “Flower” image to a song, all the song verses will be displayed with this image (Flower), except maybe the verses that have a specific image (Butterfly).
This cascading style mechanism applies to all style attributes (font, alignment, margins, transitions, etc.).
Therefore, before you modify a style attribute, always double-check the level at which you perform this operation.
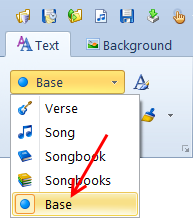
The level is indicated at the top left, where you can also select it:
This cascading style mechanism applies to all style attributes (font, alignment, margins, transitions, etc.).
Therefore, before you modify a style attribute, always double-check the level at which you perform this operation.
The level is indicated at the top left, where you can also select it:
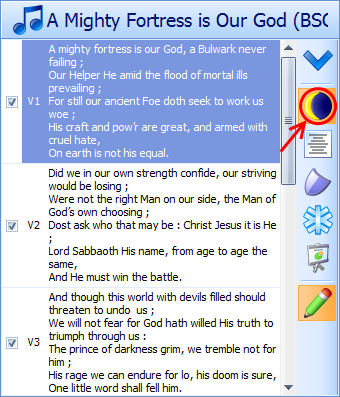
Tip When you click on certain items, the style level gets automatically synchronized.
For example, when you click a song verse, the style level is automatically positioned on "Verse".
This happens similarly when you click the “Songbooks” or “Bibles” buttons, etc.
In conjunction to the cascading styles, we will use the sequence feature between two songs:
For example, when you click a song verse, the style level is automatically positioned on "Verse".
This happens similarly when you click the “Songbooks” or “Bibles” buttons, etc.
In conjunction to the cascading styles, we will use the sequence feature between two songs:
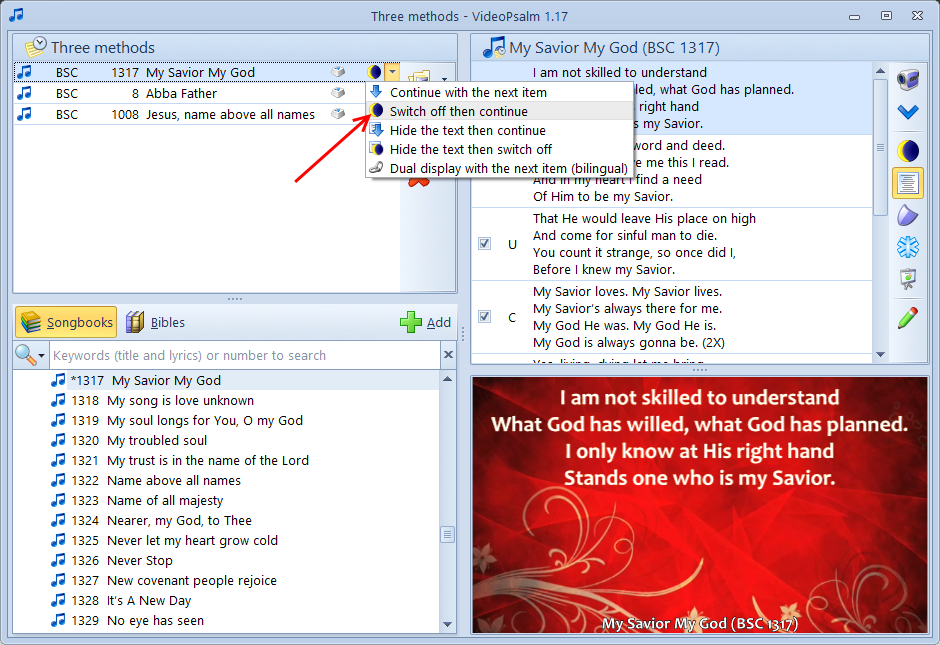
By default, VideoPsalm proposes to “Switch-off then continue”.
This means that between two songs, VideoPsalm will display a slide corresponding to the “Base” style, which is black by default (the moon).
It is this level, “Base”, that we will use here.
To summarize the method 1:
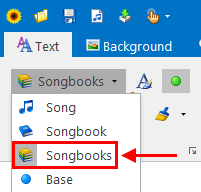
1. Click the "Songbooks" button:
This means that between two songs, VideoPsalm will display a slide corresponding to the “Base” style, which is black by default (the moon).
It is this level, “Base”, that we will use here.
To summarize the method 1:
1. Click the "Songbooks" button:

This has the effect to set the style level to “Songbooks”.
2. Set a “Black” color to this style level:
2. Set a “Black” color to this style level:
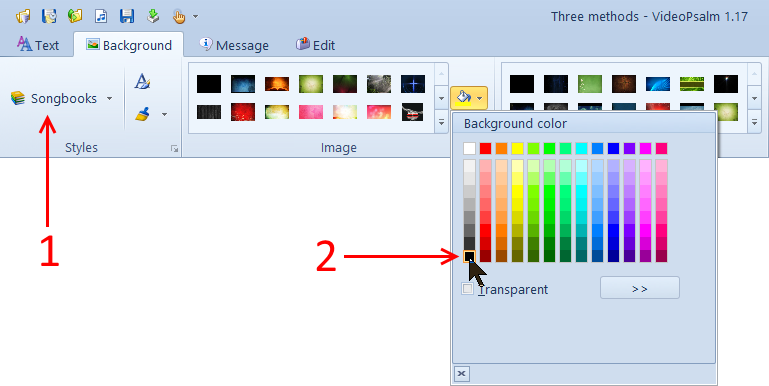
If black is already selected, select red first (for example), then select black again.
This will ensure that black is set at this level.
All verses of all songs of all songbooks will get displayed with a black background, unless the background is redefined at a higher level:
This will ensure that black is set at this level.
All verses of all songs of all songbooks will get displayed with a black background, unless the background is redefined at a higher level:
If you prefer, assign a background image to the songbooks, instead of a black color.
The key is to associate some background at the "Songbooks" level.
If you skip this step, the songs will be displayed with the logo in the background, and this is not what you necessarily want.
3. Select the “Base” style level:
The key is to associate some background at the "Songbooks" level.
If you skip this step, the songs will be displayed with the logo in the background, and this is not what you necessarily want.
3. Select the “Base” style level:
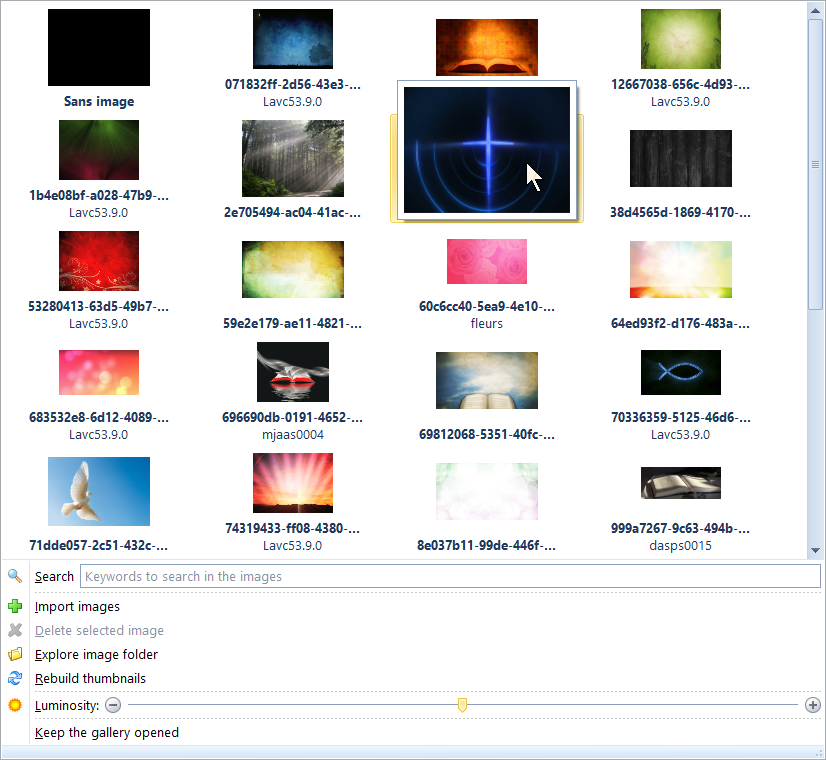
4. Select a background image to assign at the “Base” level
For example, the church logo:
For example, the church logo:
As this image is assigned to the “Base” style level, it will be displayed between two songs (while the moon is active):
The song verses, meanwhile, will be displayed with a black background or the image that you assigned to “Songbooks”.
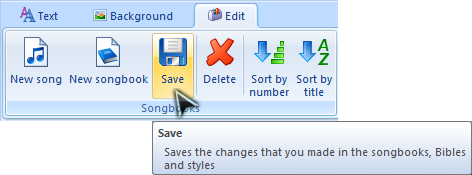
5. Save your changes:
5. Save your changes:
Method 2
Build a songbook of “image backgrounds”
to insert between two songs
This method requires preparation work once, but enables you to easily vary the background image within an agenda.
Create one song for each background images that you need.
Give a meaningful name to each song, so you can easily identify the image you have associated with it.
1. Create a new songbook:
Create one song for each background images that you need.
Give a meaningful name to each song, so you can easily identify the image you have associated with it.
1. Create a new songbook:
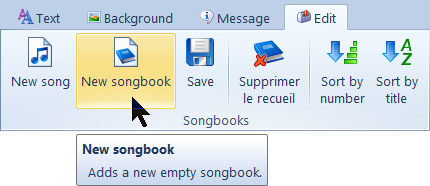
2. Name the songbook “Images” (for example):

3. Uncheck the "Include this songbook in the song search" (see # 2 above).
This will prevent the search for songs to present you songs that are actually images.
4. Add a song to this songbook:
This will prevent the search for songs to present you songs that are actually images.
4. Add a song to this songbook:
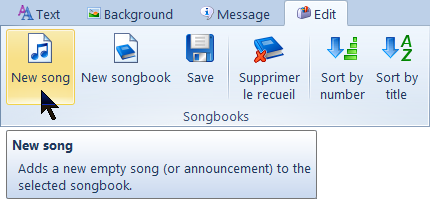
5. Give a meaningful name to this song:
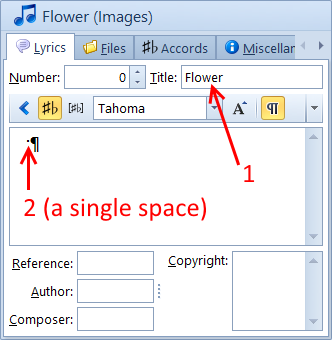
6. Enter a single verse, empty, containing a single space.
7. Assign an image to chant:
a) Click on the song to select the “Song” style level.
b) Select the image in the image gallery.
8. Create as many “Image” songs as there are images to be inserted between songs.
9. Save your changes.
Now you have a songbook of “Image” songs that you can insert between real songs in your agenda.
This operation only needs to be done once.
10. Each Sunday, build your agenda like usual, with songs and Bible verses, etc.
11. interleave an “Image” song between each agenda song or Bible verses.
12. Set the sequence between songs to “Continue with the next item”:
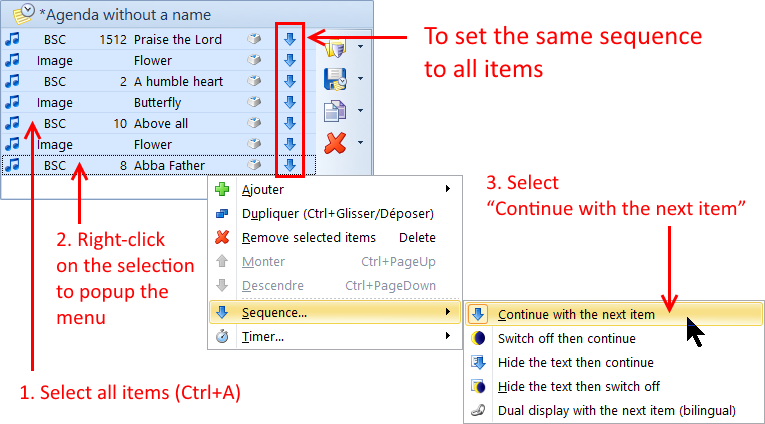
To set the sequence for multiple agenda songs at once, select them, then adjust their sequence via the context menu.
14. Try your agenda: It works!
14. Try your agenda: It works!
Method 3
Use slide show images
This is the easiest method: simply add a slideshow image between each song.
Then, as for method 2, adjust the sequence between songs to “Continue with the next item”.
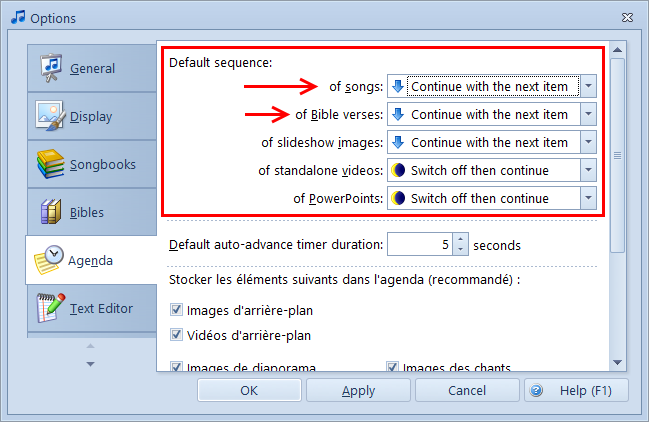
Tip If you plan on using this method most often, it is advised to adjust the default sequence value between agenda items.
You'll find this option here:
Then, as for method 2, adjust the sequence between songs to “Continue with the next item”.
Tip If you plan on using this method most often, it is advised to adjust the default sequence value between agenda items.
You'll find this option here:
That's it for the third method.
Other useful articles in this context:
For questions, please use the contact form, from where we can safely exchange emails.
Other useful articles in this context:
- Change the background of a song or a whole songbook - Cascading styles part one
- Assign a background to a song verse or to the whole song - Cascading styles part two
- Remove an image assigned to a song verse
- Automatically loop through slides
- Adjust slide text margins
- Add slideshow images to the agenda (in French)
For questions, please use the contact form, from where we can safely exchange emails.
 RSS Feed
