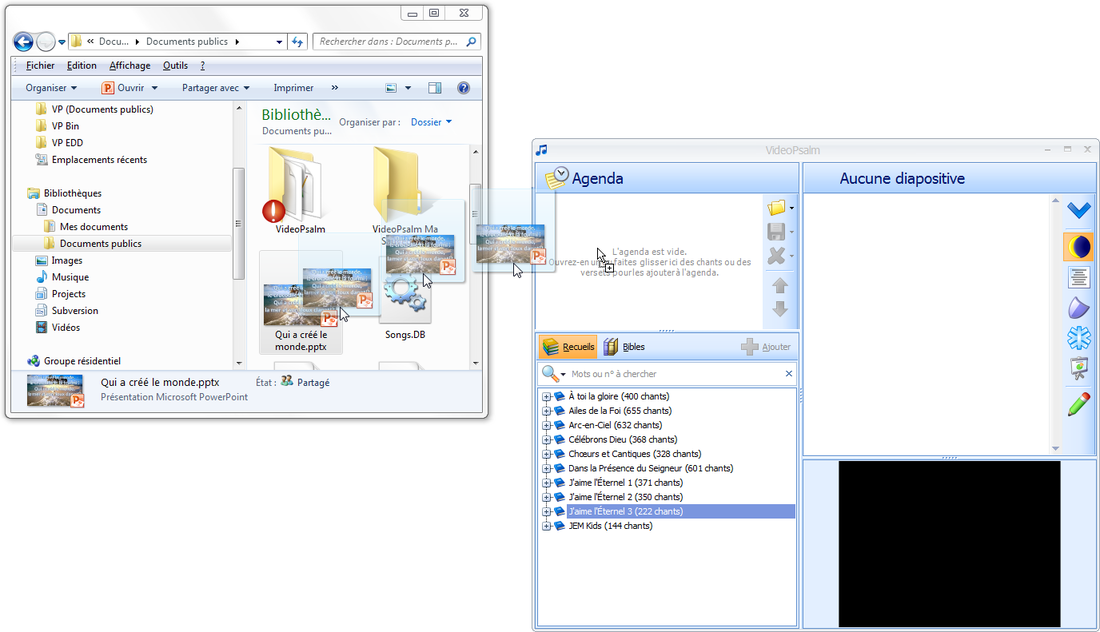
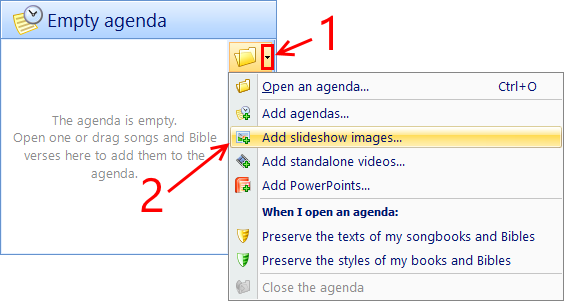
To create a slideshow in your agenda, you can either:
- Drag and drop your images from the desktop or from a file explorer into the VideoPsalm agenda surface,
- Use the agenda “Open” button, then select “Add slideshow images”.
You can then select one or several images from your hard drive:
- Your slideshow is integrated with your songs, your Bible verses, etc.:
Easily display anyone of them, for example in two clicks. - With drag and drop, easily reorder your slideshow images.
- Your agenda contains all the data for your presentation.
Save it on a USB stick, open it on another PC, and you are all set. - VideoPsalm makes best use of your screen real estate:
It displays your pictures in full screen, proportionally scaling your pictures so that they occupy the maximum screen surface, without ever modifying their aspect ratio whatsoever. - It also wont show any borders or any floating toolbar on top of your pictures:
The audience will give all the attention to the picture only. - VideoPsalm offers a consistent set of transitions between slides.
- Last but not least: you can loop through your image slideshow automatically.
Note
When you add images, videos or PowerPoints to your agenda, VideoPsalm makes a copy of these files into its own temporary folder and displays them from there. This means that if you make changes to one of these documents from outside of VideoPsalm, your changes won't be immediately reflected into VideoPsalm.
To force VideoPsalm to take your external changes into account:
- Remove the corresponding item from your agenda,
- Add the item again from its file location.
See also:


 RSS Feed
